Understand the basics of what libraries are, how they’re used in CompetencyCore, and how to create and customize your own library content
In this article:
- About libraries
- How libraries are organized
- How library items are used
- Customizing a library item
- Creating new library items
About libraries
Libraries are containers for the building blocks of your site called “library items”. We offer the following types of library items: competencies, responsibilities, education, knowledge, certification, experience, languages, working conditions, and additional information. Library items are used to build job descriptions. We’ll get to that in the Jobs Guide, but first we’ll show you how to customize library items so they’re ready to use.
How libraries are organized
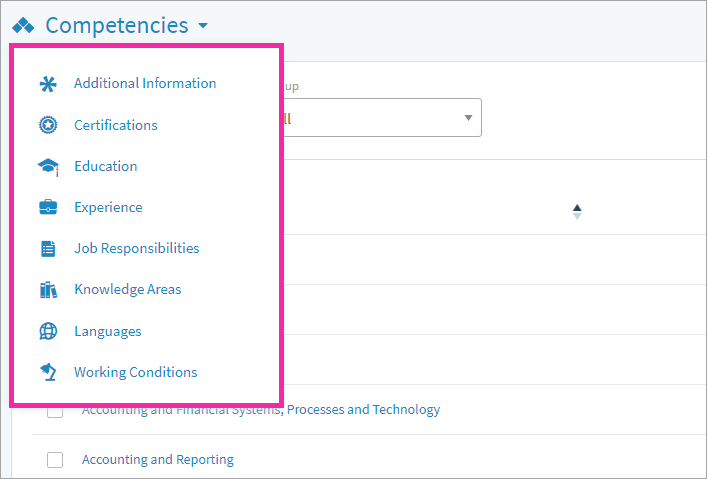
In your CompetencyCore account, navigate to Content > Libraries. On the page that opens, you’ll see the Competencies library. Click the Competencies drop-down at the top of the page to access other libraries and navigate between them.
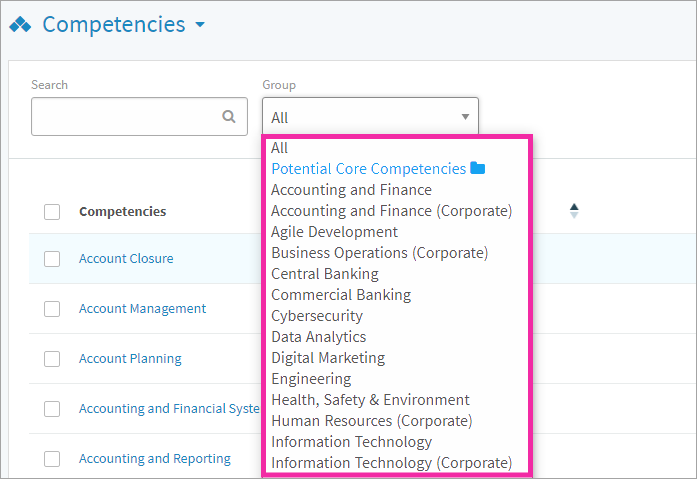
Groups organize the items within a library. Competencies have one level of groups, but other types can include sub-groups. Use the drop-down to filter by group when you’re viewing and managing libraries.
The library items are displayed in a table that you can filter by status and last updated. In a Competency library, you can click the name of a competency to open a full view of the proficiency levels and behavioural indicators.
How library items are used
To define job requirements: You’ll add library items to job descriptions. For example, you might add the library item “Teamwork” from the Competencies library to all jobs in your organization.
To complete an employee’s profile: Employees add library items to their profile so they can find out which jobs they match to in your organization.
To create tasks: Competencies are the type of library item you can use to create tasks. Interview questions, assessment questions, goals, and learning resources are all based on competencies to align employee development with your job requirements.
Customizing a library item
We provide library items for a wide range of jobs, but no two organizations are exactly alike. You have the flexibility of editing items and creating your own so you can tailor our standardized libraries to suit your needs.
To customize a competency
- Navigate to Content > Libraries.
- Select the Competencies library in the drop-down at the top of the page.
- Click the competency you want to edit.
- Click Edit on the top right of the page.
- Point and click to change the text.
- Click the check mark to save.
- Click Update Jobs to choose how to apply your changes to jobs.
To customize other types of library items
- Navigate to Content > Libraries.
- Select a library in the drop-down at the top of the page.
- Point to the item you want to edit.
- Click the 3-dot icon and select Edit Properties.
- Make your changes in the window that opens.
- Click Save or choose how to apply your changes to jobs.
Creating new library items
In addition to customizing items, you also have the option of creating new.
To create a competency
- Navigate to Content > Libraries.
- Select the Competencies library in the drop-down at the top of the page.
- Click Create on the top right of the page and select Competency.
- Select a group to place the competency in and click Next.
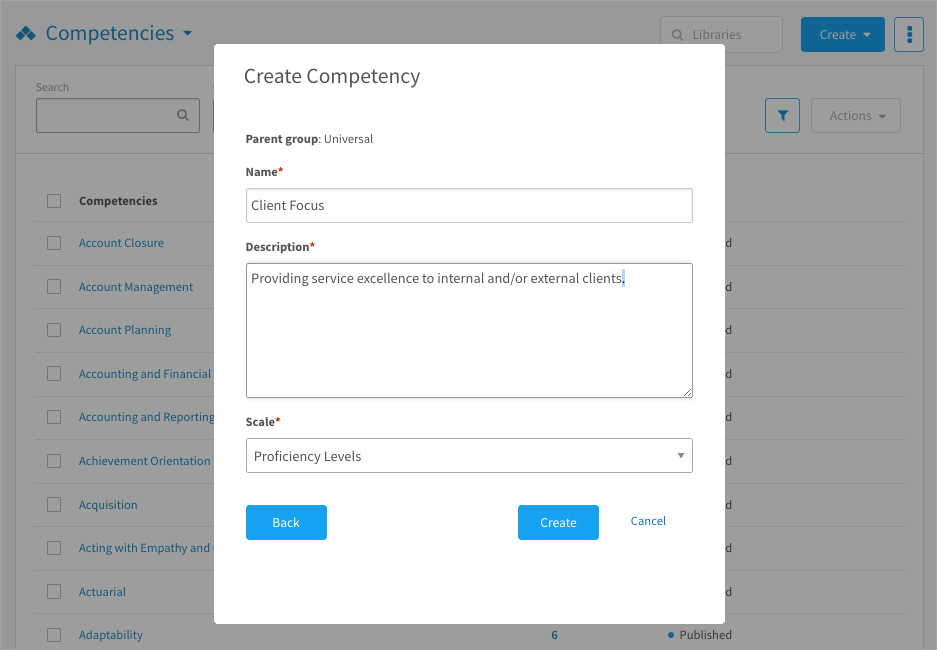
- Enter a name and description.
- Select the Proficiency Levels scale and click Create.
- Click to enter level summaries and behavioural indicators (BIs).
- Click the check mark to save the text you’ve entered.
- Click the plus icon to add BIs or the trash can icon to remove them.
- To reorder BIs, point to a level summary and click the pencil icon. Scroll to the bottom of the new window, click and drag the BIs to reorder, and then click Save.
- Changes are saved automatically, so there’s no Save button. Click Publish.
To create other types of library items
- Navigate to Content > Libraries.
- Select a library in the drop-down at the top of the page.
- Click Create on the top right of the page.
- Select the type of item you’re creating in the drop-down.
- Select a group to place the item in and click Next.
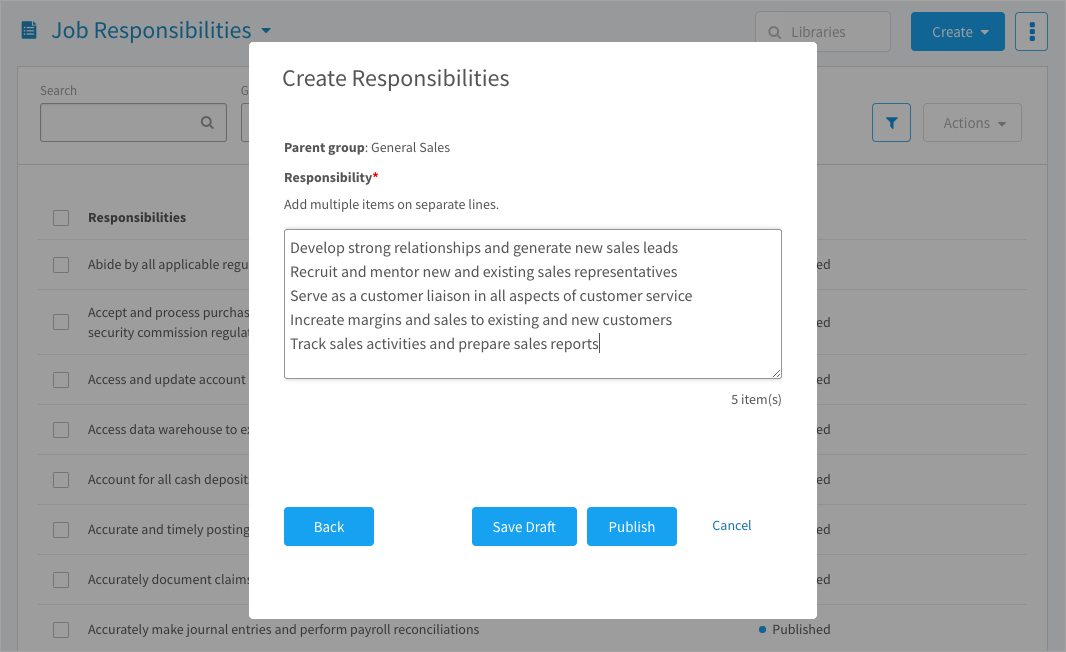
- Type in or paste each new item on a separate line.
- Click Publish so the items are available to add to jobs.
Repeat these steps to add all of the library items you’ll need to describe the jobs in your organization. This preparation in Libraries pays off when you start building job descriptions–using library items keeps them consistent. It also makes them easy to maintain because editing one library item updates all jobs where it’s been added.