Learn how to dispatch assessments, send reminders, and update subject profiles with assessment results
In this article:
- Creating a dispatch
- Managing dispatches
- Managing participants
- Sharing results and updating the subject’s profile
Creating a dispatch
Dispatching is the process of inviting participants to perform an assessment. There are four types of dispatches involving different participants:
- Self assessment: An employee assesses their own performance.
- Manager-only: A manager assesses an employee.
- 180˚: An employee and their manager assess the employee.
- 360˚: An employee and a group of participants assess the employee.
You’ll have the option of using the Regular Dispatch or the Quick Dispatch. Choose Dispatch for more flexibility or Quick Dispatch if you’re sending several different assessments. Learn more
To create a regular dispatch
- Navigate to Assessments > Dispatches.
- Click Create and select Dispatch.
- Select a dispatch type (self, manager-only, 180˚, or 360˚) and click Next.
- Select a group and a job. Select an associated assessment and click Next.
- Users in positions associated to the job are suggested as subjects. Click Add Subjects to add others. This creates a temporary association, but does not affect the org structure.
- The parent position of each subject is suggested as the manager. Leave these managers selected or click Add managers to select a different user.
- For a 360˚, you don’t need to add participants to every group. For example, you can dispatch an assessment that only has a subject, a manager, and a peer. Click Next.
- Expand Dispatch Messages and click the pencil icon to customize emails sent to participants. These changes only apply to this assessment.
- Select the group of participants to be the scoring authority.
- Select Control release so you can decide when to update the subject’s profile with results.
- Select Dispatch now or select a start date. Select an optional due date.
- If you didn’t select a start date, click Save to save as a draft. If you selected a start date, click Dispatch. The participants will receive an email on the specified date.
To create a quick dispatch
Note: 360˚ dispatches cannot be sent using Quick Dispatch.
- Navigate to Assessments > Dispatches.
- Click Create and select Quick Dispatch.
- Select a type (self, manager-only, or 180˚) and click Next.
- Select subjects (and assessments if there’s more than one) and click Next.
- If any users are not associated to a job or their job is not associated to an assessment of the specified type (grouped, ungrouped, or snapshot), you’ll see a list of Conflicts. Click Next to continue without them, or leave the assessment to resolve the conflict. Once you click to create a Quick Dispatch after resolving conflicts, you’ll be returned to where you left off. Remove the user and add them again to apply the updates to the dispatch.
- If you’ve selected a user in a position associated to a job that’s linked to more than one assessment of the specified mode, select which assessment to dispatch. Click Next.
- If some users in the dispatch don’t have an assigned Manager, click Select to choose one. This creates a temporary association, but does not affect the org structure.
- Select Control release so you can decide when to update the subject’s profile with results.
- Select Dispatch now or select a start date. Select an optional due date.
- Select Reminders to set up automatic reminders and enter how often they should be sent.
- If you didn’t select a start date, click Save to save as a draft. If you selected a start date, click Dispatch The participants will receive an email on the specified date.
Managing dispatches
To edit a draft dispatch
If you saved your dispatch as a draft, you can make changes before dispatching.
- Navigate to Assessments > Dispatches.
- Deselect the My dispatches checkbox if you’re not the creator.
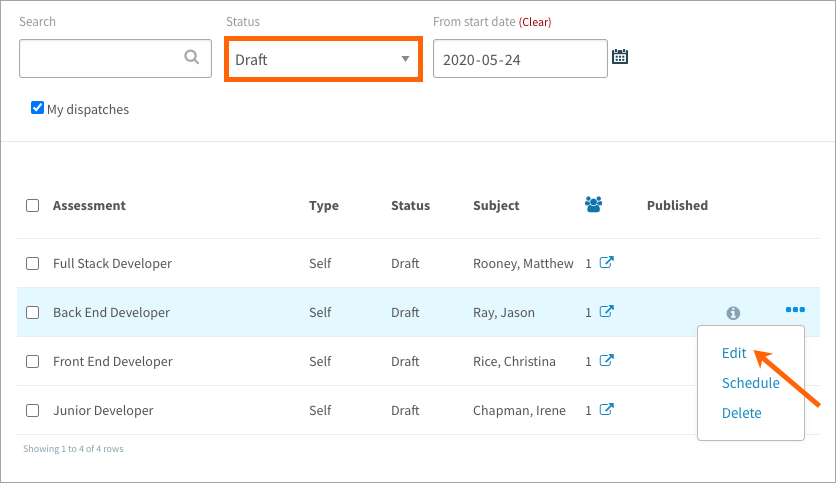
- Select Draft in the Status filter.
- Point to a dispatch in the table and click its 3-dot icon.
- Select Edit in the drop-down.
- Make changes to the job, assessment, subjects, and participants.
- On the final page of dispatch, click Save.
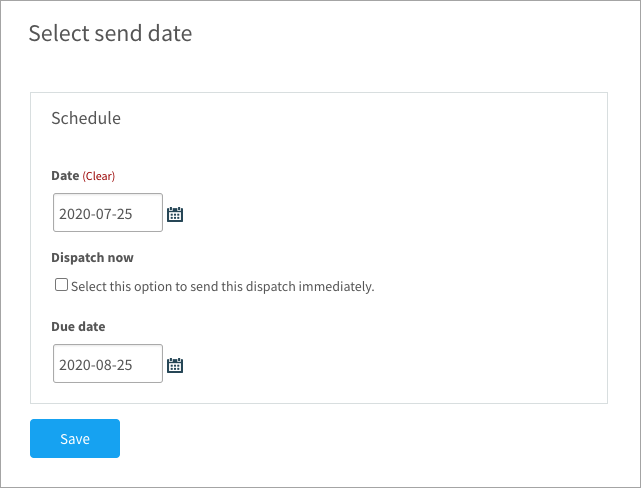
To schedule a draft dispatch
Once it’s ready to go, select a start date to schedule the dispatch.
- Navigate to Assessments > Dispatches.
- Deselect the My dispatches checkbox if you’re not the creator.
- Select Draft in the Status filter.
- Point to a dispatch in the table and click its 3-dot icon.
- Select Schedule in the drop-down.
- Set a start date or select Dispatch now.
- Enter an optional due date.
- Click Save to schedule the dispatch.
To delete a dispatch
Deleting a dispatch permanently removes the dispatch from your site. When participants try to access the assessment, they’ll receive an alert explaining that the assessment has been deleted.
Note: For completed dispatches, you’ll need to reopen before you can delete.
- Navigate to Assessments > Dispatches.
- Deselect the My dispatches checkbox if you’re not the creator.
- Point to a dispatch in the table and click its 3-dot icon.
- Select Delete in the drop-down.
- Click OK to confirm.
To reopen a dispatch
Dispatches are marked as complete once all participants have submitted the assessment. If you want to add more participants or delete a dispatch, you’ll need to manually reopen.
- Navigate to Assessments > Dispatches.
- Deselect the My dispatches checkbox if you’re not the creator.
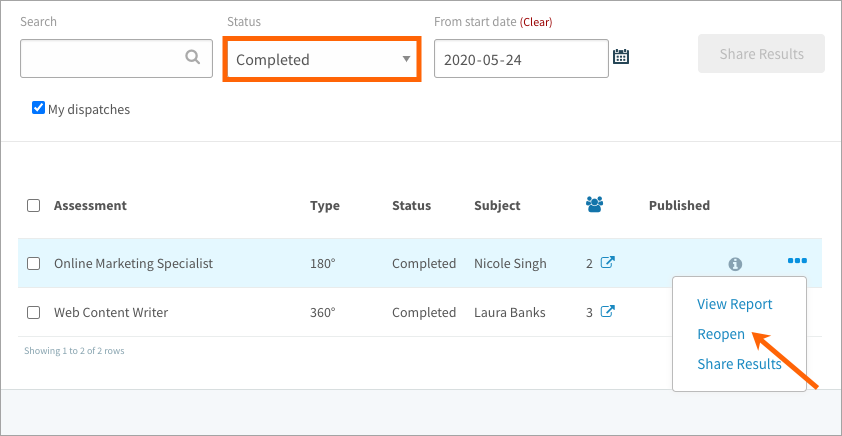
- Select Completed in the Status filter.
- Point to a dispatch in the table and click its 3-dot icon.
- Select Reopen in the drop-down.
- Click OK to confirm.
To close a reopened dispatch
The close action is only available for completed assessments that you’ve manually reopened. Closing the dispatch changes the status back to Complete so you can download the report.
- Navigate to Assessments > Dispatches.
- Deselect the My dispatches checkbox if you’re not the creator.
- Select In progress in the Status filter.
- Point to a dispatch in the table and click its 3-dot icon.
- Select Close in the drop-down.
- Click OK to confirm.
Managing participants
To add new participants
The new participants will receive an email and a notification with a link to access the assessment. You can add participants to scheduled or in-progress dispatches.
- Navigate to Assessments > Dispatches.
- Deselect the My dispatches checkbox if you’re not the creator.
- Select Scheduled or In progress in the Status filter.
- Point to a dispatch in the table and click its 3-dot icon.
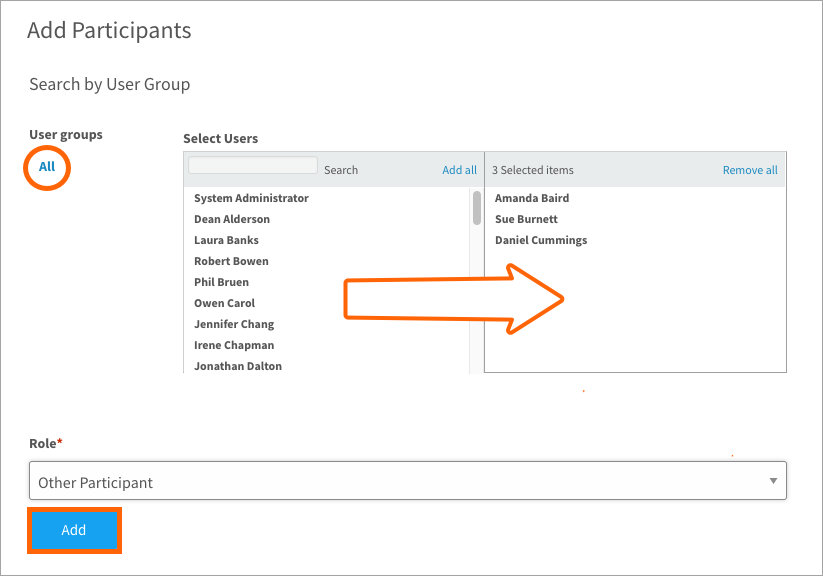
- Select Add Participants in the drop-down.
- Click All under the User groups heading.
- Select users in the left-hand column to add them to the right-hand column.
- Select the role of the newly added users and click Add.
- Once you’re finished adding participants, click Save.
To send individual reminders
You can send a reminder to a specific participant and customize the message before it’s sent.
- Navigate to Assessments > Dispatches.
- Deselect the My dispatches checkbox if you’re not the creator.
- Select In progress in the Status filter.
- Click the external link icon in the Participants column.
- Point to a participant and click the 3-dot icon.
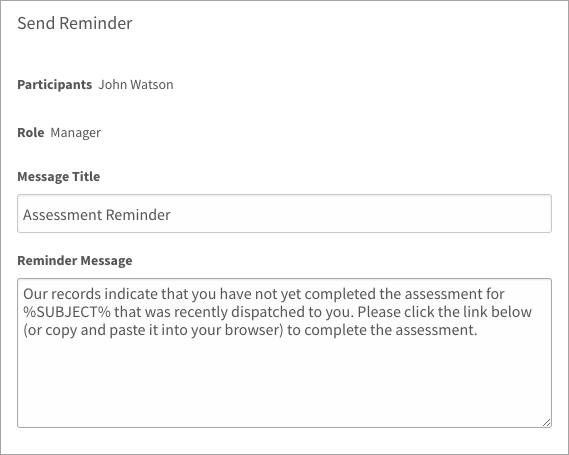
- Select Send Reminder in the drop-down.
- Customize the message if needed and click Send.
To send reminders in bulk
Sending reminders in bulk allows you to quickly notify all incomplete participants on multiple dispatches that they still have an assessment to complete. The reminder message cannot be customized when you send bulk reminders.
- Navigate to Assessments > Dispatches.
- Deselect the My dispatches checkbox if you’re not the creator.
- Select In progress in the Status filter.
- Select the checkbox beside each dispatch you want to include.
- Click Send Reminders on the top right of the page.
- Click OK to confirm.

To remove participants
Managers, peers, and reports can be removed, but the the subject cannot be removed. If the Deleted participant notification setting is turned on, the participant receives an email explaining that their feedback is no longer required. To check this setting, go to Administration > Settings > Notifications.
- Navigate to Assessments > Dispatches.
- Deselect the My dispatches checkbox if you’re not the creator.
- Select In progress or Completed in the Status filter.
- Click the external link icon in the Participants column.
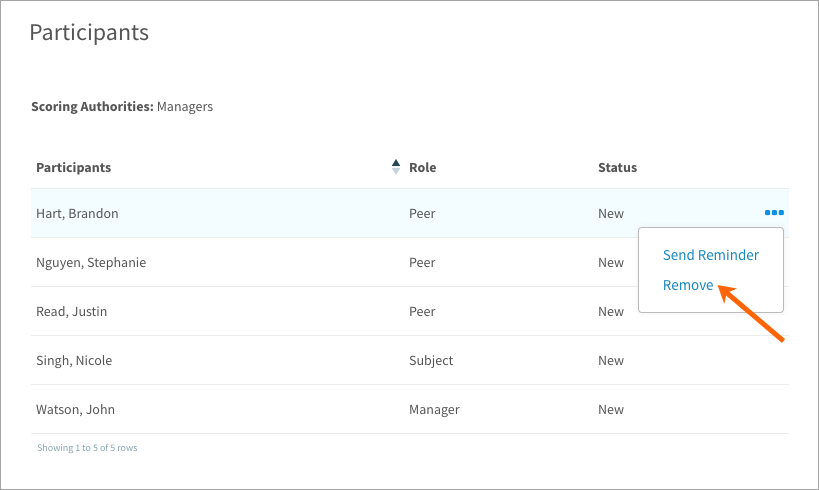
- Point to a participant and click the 3-dot icon.
- Select Remove in the drop-down.
- Click OK to confirm.
Note: If the removed participant was the scoring authority and they’re the only user in that participant group, the subject is made the scoring authority.
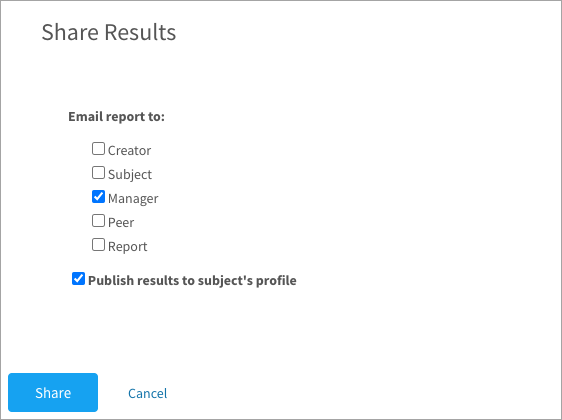
Sharing results and updating the subject’s profile
The PDF report can only be shared with the participant groups selected in the Permission to view report setting when the assessment was created.
- Navigate to Assessments > Dispatches.
- Deselect the My dispatches checkbox if you’re not the creator.
- Select Completed in the Status filter.
- Select the checkbox beside each dispatch you want to include.
- Select participant groups to receive an email with a link to the PDF report.
- If it’s a controlled release, select Publish results to subject’s profile.
- Click Share.
Tip: Check out the How do assessment results update user profiles? FAQ.