Learn how to update account information, set passwords, enable or disable users, and more
In this article:
- Creating users
- Changing a user’s info and uploading profile pictures
- Setting passwords
- Enabling or disabling users
- Assigning security profiles
- Exporting personal data
- Requesting sign-off
- Sending sign-off reminders
Creating users
To participate in CompetencyCore tasks, the employees in your organization need their own accounts. There are two ways of adding new users: create accounts directly in CompetencyCore one at a time, or import accounts in bulk from an Excel spreadsheet.
- Click the gear icon on the top right of your screen.
- Expand User Management in the Administration menu and click Users.
- Click Add on the top right of the page and select New User.
- Enter a first name, last name, email, and username. Emails and usernames need to be unique. For the username, you can reuse the email so it’s easy to remember. Click Add.
- Click Send Activation button to email the user a link to create their own password. To set the password yourself, follow the steps below.

Changing a user’s info and uploading profile pictures
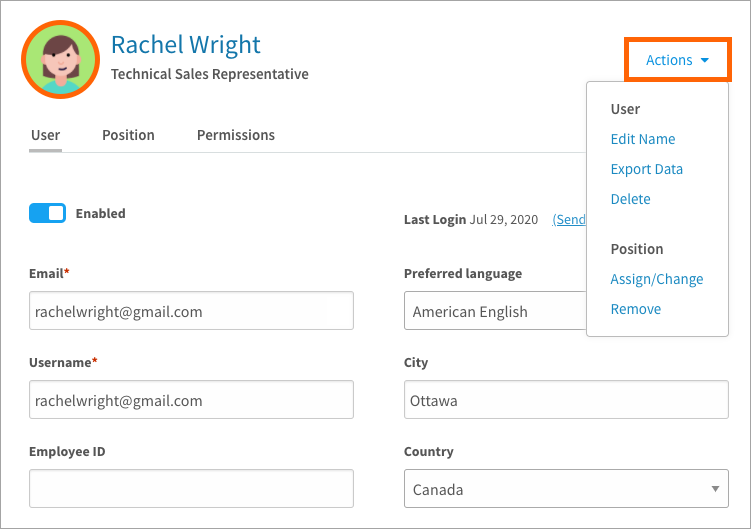
Once a user has access to CompetencyCore, they can start personalizing their account with a profile picture. An end user can edit their username, first name, last name, email address, city, province/state, and country as well as reset their password. This account info is also editable from the administrator’s end.
- Click the gear icon on the top right of your screen.
- Expand User Management in the Administration menu and click Users.
- Click the filters icon to help you find a specific user.
- Click the name of a user to open the User Details page.
- Click the user’s initials beside their name to upload a profile picture (max size is 1.5MB).
- To edit the name, click Actions and select Edit Name. Make your changes and click Save.
- Edit the user’s email address, username, employee ID number, country, province/state, city, and hire date. Any changes made to these fields are saved automatically.
Setting passwords
By default, CompetencyCore passwords are set by the end user. The Administrator emails a link to an employee from the Users page that allows the employee to create their own password.
Option 1. Send password links in bulk
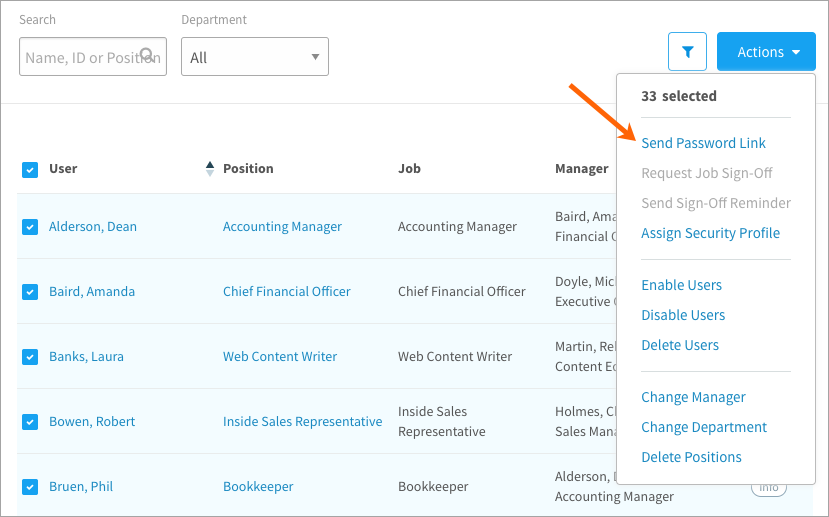
- Click the gear icon on the top right of your screen.
- Expand User Management in the Administration menu and click Users.
- Select the users you’d like to send a password link.
- Click Actions and select Send Password Link.
- Click OK to confirm. The selected users receive an email with their username and a link to set their password. Their account will be auto-enabled once they’ve set their password.
Option 2. Set passwords for users
If needed, the administrator can create passwords. We don’t recommend this option for security reasons. But if this is how you’d like to set them up, follow the steps below.
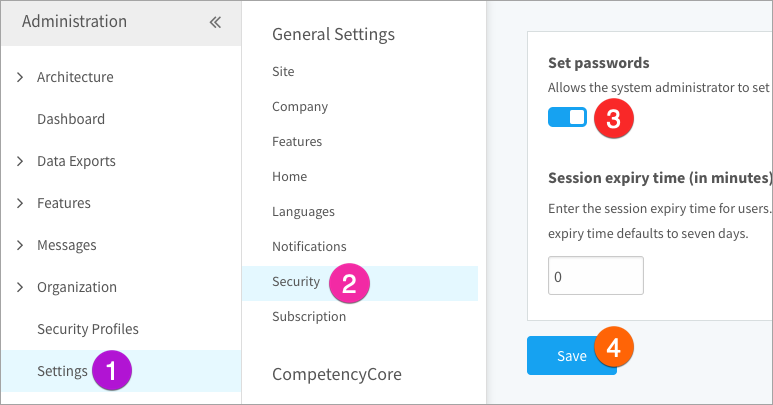
- Click the gear icon on the top right of your screen.
- Click Settings in the Administration menu.
- Click Security under General settings.
- Turn on the Set password setting, and click Save.
- Return to the Users page where you’ll now see the option to set passwords in bulk from the Actions menu or from the user’s account info.
- If you’re setting the password from the User Details page, click Send Notification to email the user notifying them that their account has been created. This email will also include a link to the CompetencyCore site. Then you’ll need to email the user their username and password.
Enabling or disabling users
As an administrator, you can disable a user who no longer needs access to CompetencyCore. The user will no longer be able to access their account, but you can always re-enable if needed.
- Click the gear icon on the top right of your screen.
- Expand User Management in the Administration menu and click Users.
- Click the funnel icon and select Disabled or Enabled.
- Select the users you want to enable or disable.
- Click Actions and select Enable Users or Disable Users.
Note: Can’t enable a user? Users created through an import need a password before they can be enabled. Check out the Organization import article to learn more.

There are a couple other ways that user accounts can be disabled:
- A user attempts to log in with an incorrect username or password five times. Their account is automatically disabled. It will be automatically re-enabled after 30 minutes or the administrator can manually re-enable the account.
- An administrator attempts to delete a user. If the user is assigned to content like an assessment, their account is disabled instead of deleted.
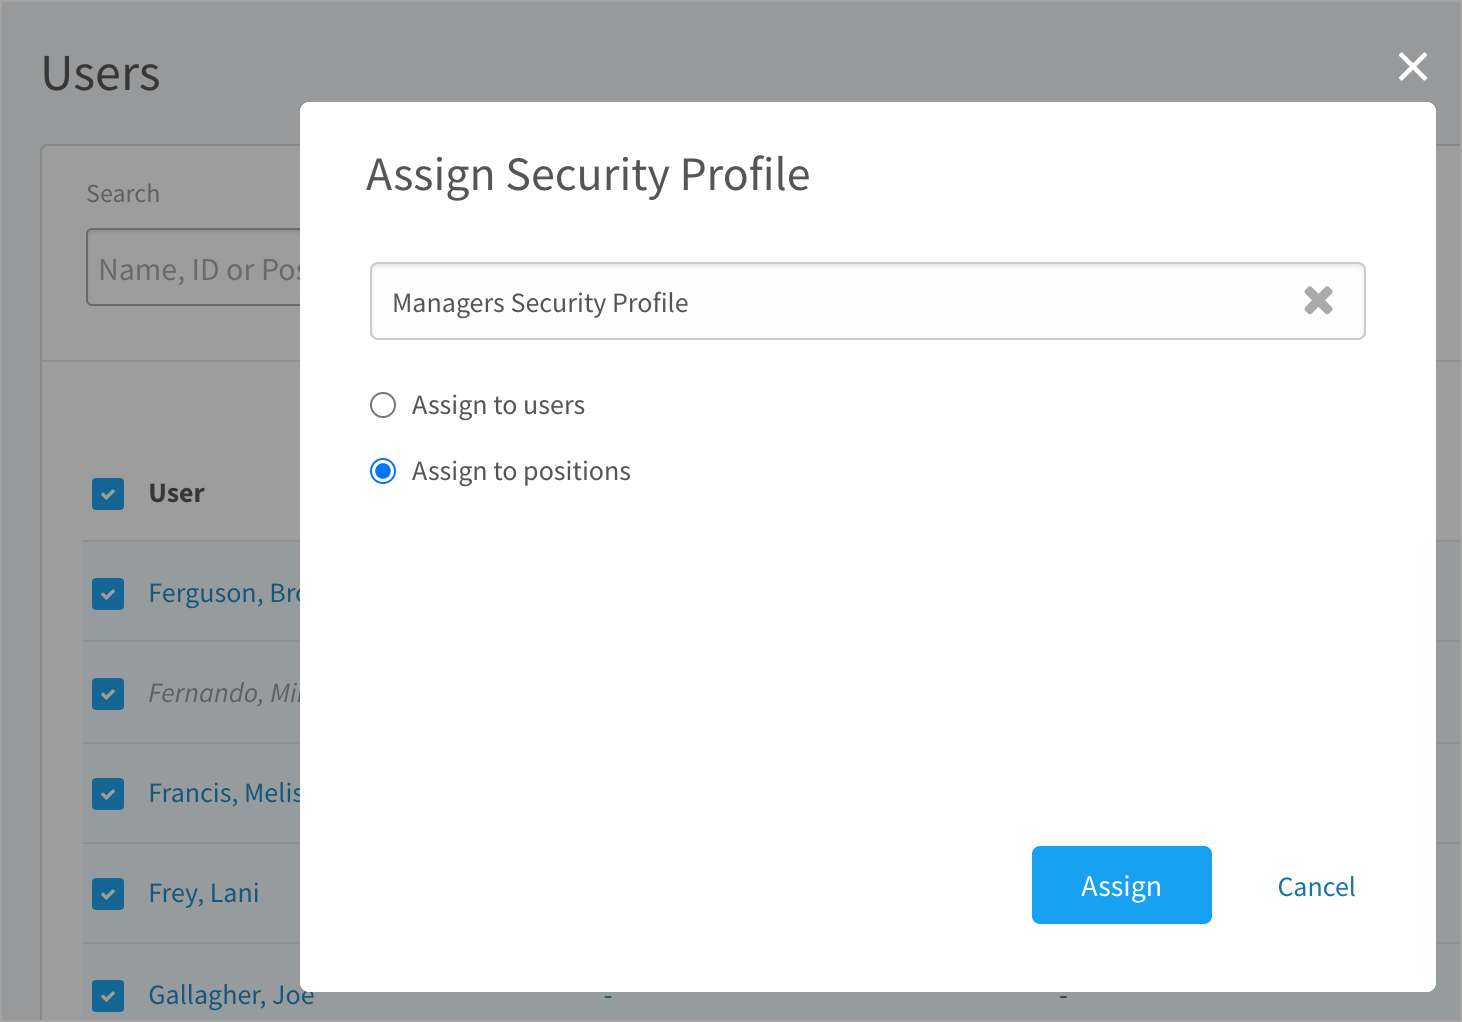
Assigning security profiles
- Click the gear icon on the top right of your screen.
- Expand User Management in the Administration menu and click Users.
- Select the users you’d like to assign to a profile.
- Click Actions and select Assign Security Profile.
- Search for and select a security profile to assign.
- Select Assign to users or Assign to positions.
- Click OK to confirm.
Exporting personal data
In support of the right to data portability required by the General Data Protection Regulation (GDPR), we offer an export of each user’s personal data. If an employee in your organization requests their personal data, you can download a JSON file from CompetencyCore.
- Click the gear icon on the top right of your screen.
- Expand User Management in the Administration menu and click Users.
- Click the name of a user to open the User Details page.
- To edit the name, click Actions and select Export Data.
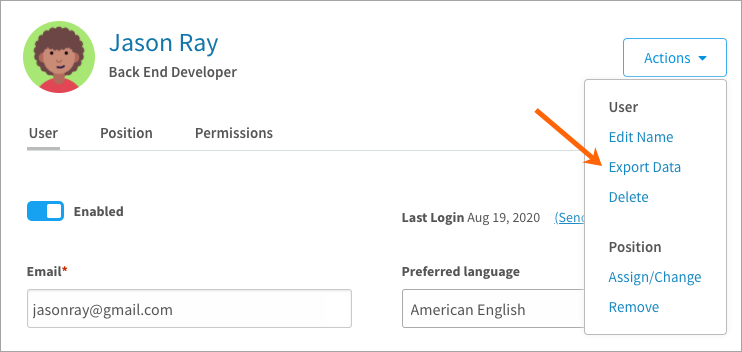
In your downloads, you’ll see a zipped folder containing between one and five JSON files. For all users, you’ll get a contact file with their account details. Depending on the user, you might also receive a file for their profile, assessments, plans, and testing results. These files contain information about the user provided by the user, not by other people. For example, you won’t see a manager’s ratings of the user’s performance plan.
Requesting sign-off
This action is only available if Employee sign-off is enabled.
- Click the gear icon on the top right of your screen.
- Expand User Management in the Administration menu and click Users.
- Click the funnel icon and select None in the Job Sign-Off filter.
- Select users and click Actions.
- Select Request Job Sign-Off.

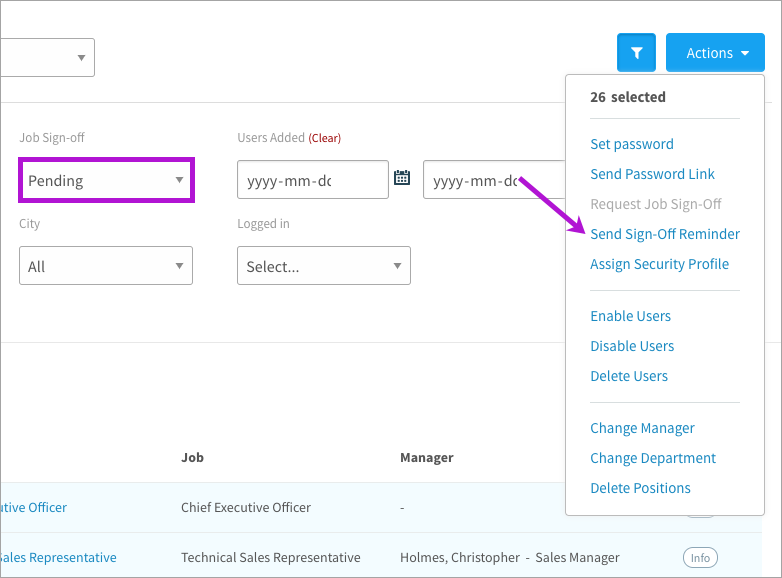
Sending sign-off reminders
This action is only available if Employee sign-off is enabled.
- Click the gear icon on the top right of your screen.
- Expand User Management in the Administration menu and click Users.
- Click the funnel icon and select Pending in the Job Sign-Off filter.
- Select users and click Actions.
- Select Send Sign-Off Reminder.
- Customize the message in the textbox and click Send Reminder.