Learn how to add library items to jobs and publish your first job description
In this article:
- Before you begin
- How jobs are organized
- Building your first job
- Defining reporting relationships
- Adding items from libraries
- Publishing your job
- Copying a job post
- Viewing similar jobs
Before you begin
In this article, we’ll help you find your way around and show you how to publish your first job. Before getting started, check out the Quick start for libraries article to make sure your competencies and other items are ready to go. Once you’ve mastered the basics, we’ll show you how to manage job descriptions. You’ll find more options that allow you to structure jobs so they reflect the unique needs and goals of your organization in the Customize job templates article.
How jobs are organized
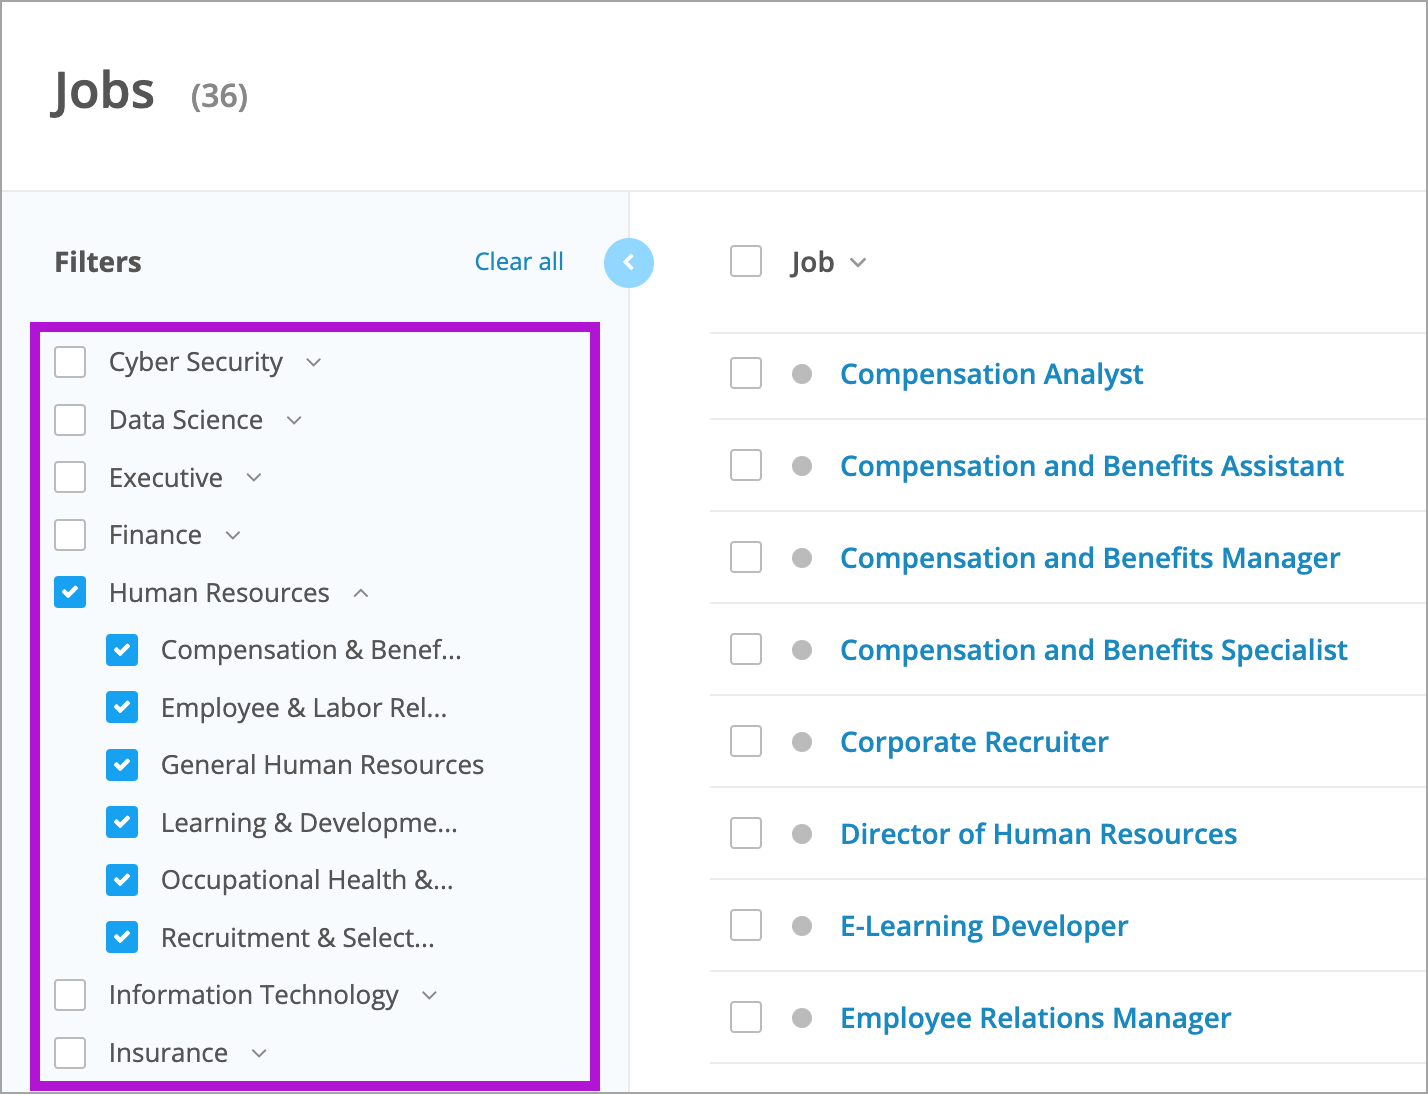
In your CompetencyCore account, navigate to Content > Jobs. You’ll see a table listing job titles. Jobs are organized into groups such as “Human Resources”, “Sales”, or “Accounting”. By default, we display jobs from all groups in alphabetical order. To see jobs that belong to one group, select a group in the filter.
Building your first job
All jobs start out as drafts that are not visible to employees, so you can keep your work private until the job description is complete. There are three ways to add a new job:
Create a blank job
- Navigate to Content > Jobs.
- Click Create on the top right of the page.
- Select Job in the drop-down.
- Enter a job title.
- Select or create a new group.
- Click Create Job.
Create a job from a template
Note: Contact your Client Success Specialist to learn more about adding this feature.
- Navigate to Content > Jobs.
- Click Create on the top right of the page.
- Select Job in the drop-down.
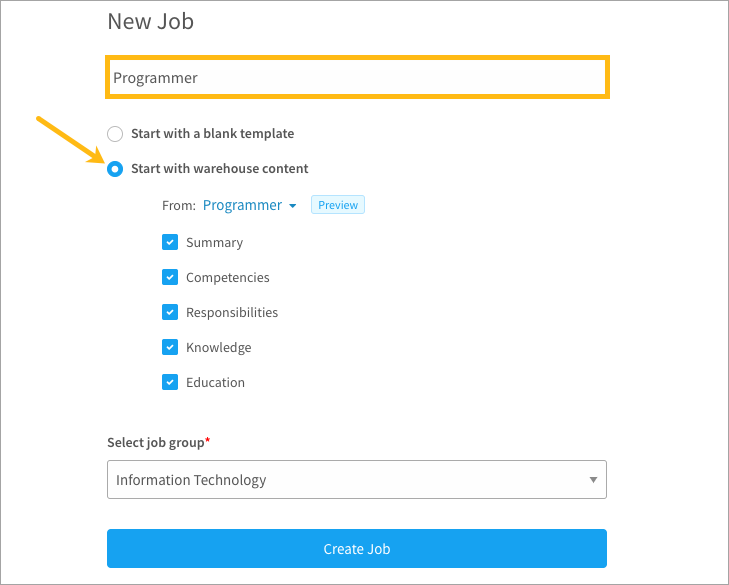
- Enter a job title.
- Select the Start with warehouse content radio button.
- Click the drop-down to select a suggested job.
- Click Preview to see the library items included.
- Deselect any library types you don’t want to include.
- Select or create a new group.
- Click Create Job.
Edit an existing job
If you want to customize a job, click its name in the table and click Edit.
Clone an existing job
This is a great option if there’s another job on your site that’s similar to the one you’re creating. Just click the 3-dot icon and select Clone. A copy of the job is created and named “Copy of…”. Select this cloned version to open your draft.
Defining reporting relationships
Note: The “Reports to” field is separate from positions and does not automatically create or update reporting relationships in your site. To create positions and structure them in a hierarchy, check out the Manage positions article.
Edit a job description and scroll to the Information section. You can enter a job title in the “Reports to” field to define the reporting relationship. Matching job titles are suggested in the drop-down or you can enter a new title.
To change the job title, hover over the “Reports to” field and click the pencil icon. Keep in mind that changes are only applied to this field; they will not be automatically updated in the title of the manager’s job description.
The parent position’s job title is suggested in the drop-down if positions are set up on your site. However, the “Reports to” field is separate from the hierarchy of positions in your organization. When you make changes to positions, the “Reports to” field won’t be automatically updated.
Adding items from libraries
At the top of a draft, you can change information like the group, or click to edit the summary. Below this information are categories for Competencies, Responsibilities, Education, and other requirements.
Each category on your job has a corresponding library. For example:
- An Education library has fields of study such as “Psychology” and “Software Engineering”.
- A Responsibilities library has statements such as “Monitor and order office supplies”.
- A Competencies library has competencies such as “Client Focus” and “Teamwork”.
Each field of study, responsibility, and competency is a library item that can be added to a job. This setup allows you to build all of your jobs with the same set of building blocks. The options available for adding library items to jobs depend on the library type. For a list of the options available for each type, check out the library item properties.
To add competencies
AI suggestions: You can find the best competencies for your job description using our AI suggestions. These suggestions are based on your job’s summary and responsibilities.
Search: Start typing a library item name like “Client Focus”. If the item is published in a library, it appears in the drop-down. Select the item to add it to your job.
Browse: A new window opens where you can select a library and then select items to add.
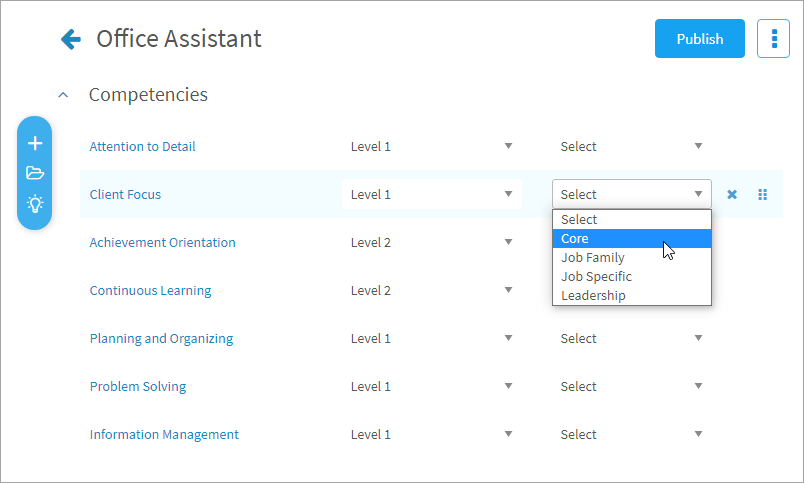
Levels: It’s important to select a proficiency level for competencies. You can click a competency name to remind yourself of the behaviours that define each level. Once selected, the behaviours for that level are listed on the job.
Core, Job Family, Job Specific, or Leadership: You can select a type for each competency.
- Core are required by all employees to achieve the organization’s mandate and vision.
- Job family are shared within a job group.
- Job specific will vary between roles.
- Leadership are for roles that involve managing, supervising, or influencing others.
To add education, certification, knowledge, experience, and languages
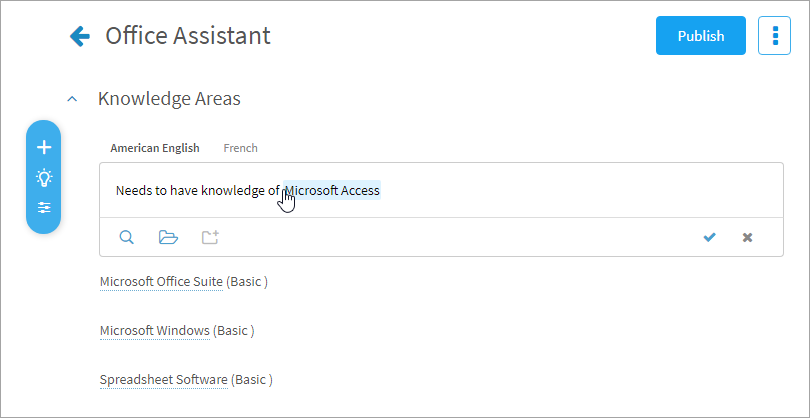
Add: You can add new items directly to the job. They’re created and stored in an Uncategorized group in your library. Click the add icon and start typing, or paste a list of requirements. If the item is already in a library, the existing item is used so you don’t need to worry about duplicates.
Descriptive text: You can add text like “Needs to have knowledge of…” around an item. Once you click the check mark, the underlined text indicates what is identified as an item. To make adjustments, click the text. If there’s a word you want to convert to an item, highlight the text and click the add to library icon. If there’s a word that should not be an item, highlight the text and click the convert to plain text icon.
Search: Click the search icon or use the # keyboard shortcut and type in an item. If the item is published in a library, it appears in the drop-down. Select the item to add it to your job.
Browse: A new window opens where you can select a library and then select items to add.
Equivalents: When one line includes multiple items, you can mark them as equivalent. For example, an HR manager requires a bachelor’s degree in Human Resources, but a degree in Business Administration might also be accepted. Click the Properties icon and select the Equivalent items checkbox (this does not apply to Experience statements).
Levels: For education, certifications, knowledge, and languages, you can further define an item by selecting a level. For example, a developer might need to have advanced knowledge of JavaScript. Click the Properties icon and select a level from the drop-down. Once you select a scale level, it will be inserted in brackets following the item.
To add responsibilities, working conditions, and additional information
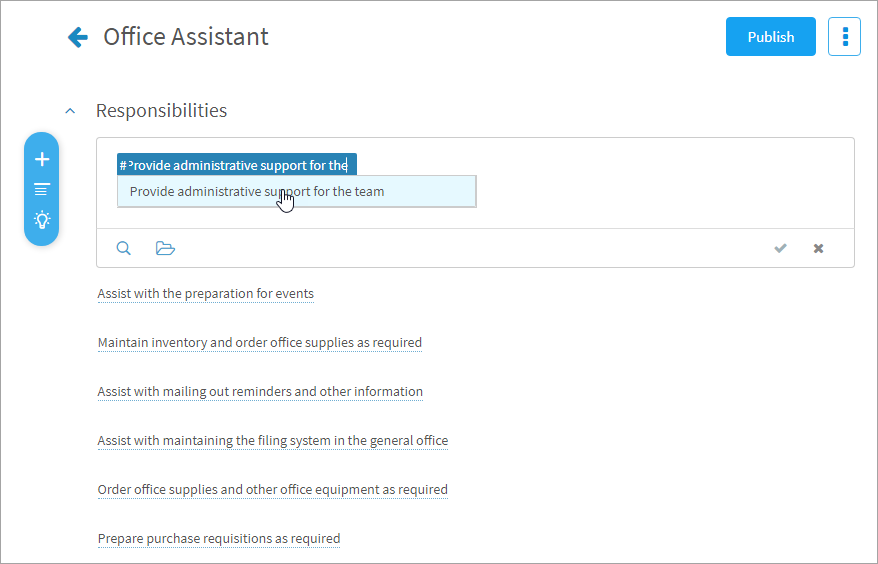
Add: You can add new items directly to the job. They’re created and stored in an Uncategorized group in your library. Click the add icon and start typing, or paste a list of requirements. If the item is already in a library, the existing item is used so you don’t need to worry about duplicates.
Search: Click the search icon or use the # keyboard shortcut and type in the requirement. If the item is published in a library, it appears in the drop-down. Select the item to add it to your job.
Browse: A new window opens where you can select a library and then select items to add.
Publishing your job
Congratulations! You’ve successfully built your first job description. Changes made to a draft are saved automatically, so don’t worry about losing your work. You can click the 3-dot icon on the top right of the page and select Export PDF to see how it looks.
Once you’re ready to make this job available to employees, click Publish. Now that you know how to add library items and define them, you can build out all of the jobs in your organization.
Copying a job post
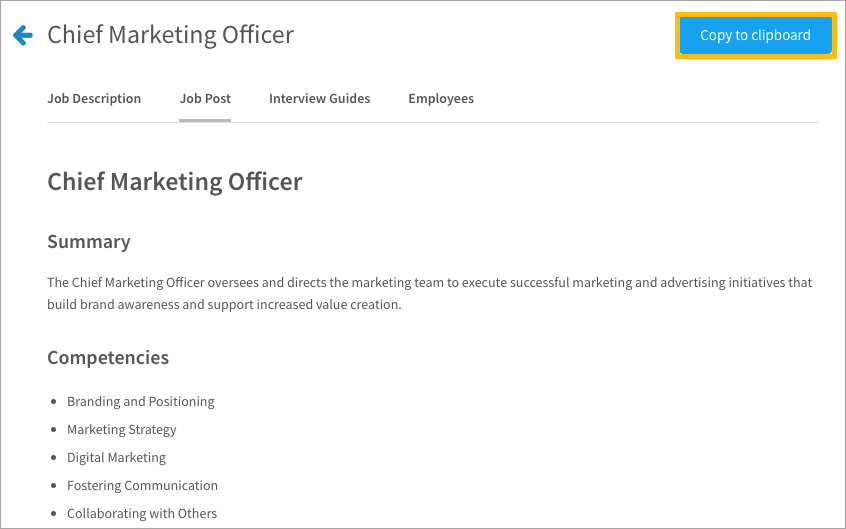
Click the Job Post tab at the top of the page to view a simple text version of the job description. CompetencyCore generates a job post for each published job. Click Copy to clipboard so you can easily paste the job post in an email, on a job board, or an ATS. Follow the steps in the Customize job templates article to learn how to configure the job post format.
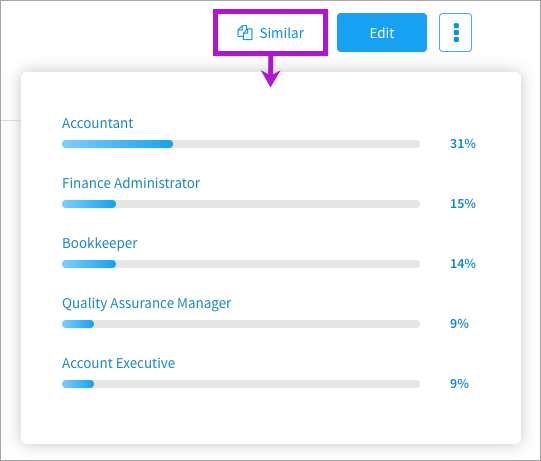
Viewing similar jobs
Click the Similar button to see the top five most similar published jobs. You can Click a job to open that job. The percentage match is calculated by comparing library items on each job. Unlike the comparison of user profiles to jobs, each library item is weighted equally.