Learn how to configure the job description template and the job post template
In this article:
- About templates
- Accessing templates
- Configuring the job description template
- Configuring the job post template
About templates
Your site comes with two templates: one for job descriptions, and one for job posts. The format for all job descriptions and all job posts are controlled from these templates. We provide default layouts, but templates are completely reconfigurable.
On the job description template, you can select:
- Which information fields to include.
- Order of library types.
- Display mode of competencies.
- Display mode of responsibilities.
- Show or hide a legal disclaimer.
- Show or hide a signature field.
On the job post template, you can select:
- Which sections to include.
- Section header names.
- Order of sections.
- An about company content document.
- Which library types to include.
- A recruitment policy content document.
Note: The job post is a simple text version of a job description that CompetencyCore generates for each published job on your site.
Accessing templates
- Click Jobs in the main menu.
- Click Menu on the top right of the page.
- Select Edit Layout in the drop-down.
- Click the Job Description or Job Post tabs to switch between templates.
Configuring the job description template
Decide which information fields to include
Click Manage to enable and disable SOC or NOC codes. You can also view whether job locations, levels and types are enabled, and click the external link icon to manage these fields in Administration. You can also choose to show or hide the job summary on job descriptions.

Select the order of library types
Click and drag the grips on the left side of a section name to reorder. While you can reorder library types on template, renaming is managed in Administration. Follow the steps in the Manage library types article to learn more.
Select a competency display mode
Select an option in the Display Mode drop-down:
- Group: Organized based on their groups in libraries.
- Architecture: Organized by Core, Job Family, Job Specific, and Leadership.
- Flat: Competencies appear in a flat list with no headings.
Select a responsibilities display mode
Select an option in the Display Mode drop-down:
- Section headers: Create your own headings directly on each job description. You can create headers directly on a job, and you can also set up a list of options to suggest on jobs in Administration.
- Sub-group titles: Organized based on their sub-groups in libraries.
- None: Responsibilities appear in a flat list with no headings.
Show or hide a disclaimer
Choose to show or hide the disclaimer in exported job descriptions. If no disclaimer is available, follow the steps below to create a new document:
- Create a category and content document: Follow the Manage content documents article to create a category and document.
- Select the category and document in settings: Go to Administration > Settings > Jobs. Select the category you created in the Category for legal disclaimer in job exports setting. Select the document in the Legal disclaimer in job exports setting. Scroll to the bottom of the page and click Save.
- Choose to show in exports on the job template: Return to the Job Template page and click the drop-down to select Show in exports.
Show or hide a signature field
Choose to show or hide the signature field in exported job descriptions
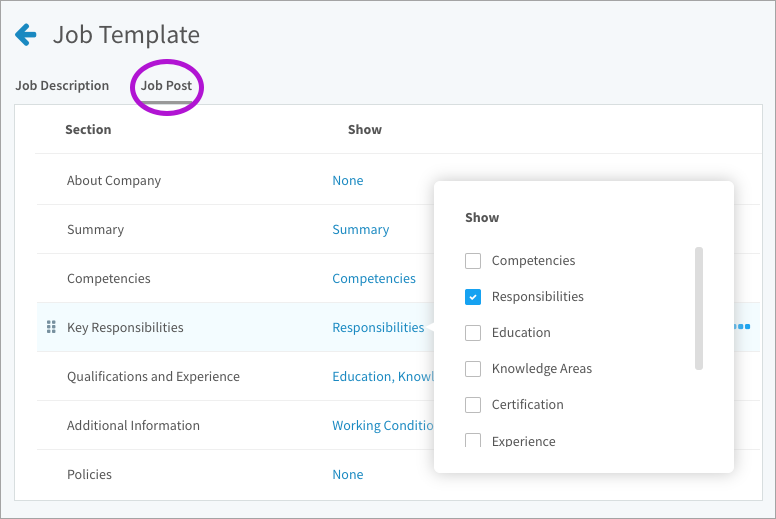
Configuring the job post template
Select which sections to include
Click the blue text beside a section to open a drop-down where you can select what to display. Deselect all checkboxes in a section to hide that section from the job post.
Customize section header names
For any section, click the 3-dot icon and select Rename in the drop-down to make changes.
Select the order of sections
Click and drag the grips on the left side of a section name to reorder.
Select an about company content document
Follow the Manage content documents article to create a category and document. Back on the template, click the gear icon to select the document.
Select the library types to include
The default library types included are listed below, but you can customize as needed. Only library types with an existing library on the site are available to select. Click the blue text in the Show column to make changes to the the content included in each section.
- Competencies: Competencies. Only competency names are displayed on the job post. Competency types, proficiency levels, and behavioural indicators are not included.
- Key Responsibilities: Responsibilities
- Qualifications and Experience: Education, Certifications, Knowledge, Experience, and Languages. Levels are included. Unlike the job description, the job post does not distinguish between library items and descriptive text.
- Additional Information: Additional Information and Working Conditions
Select a recruitment policy document
Follow the Manage content documents article to create a category and document. Back on the template, click the gear icon to select the document.