Learn how to create positions associated to users and jobs to reflect the reporting hierarchy in your organization
In this article:
How it works
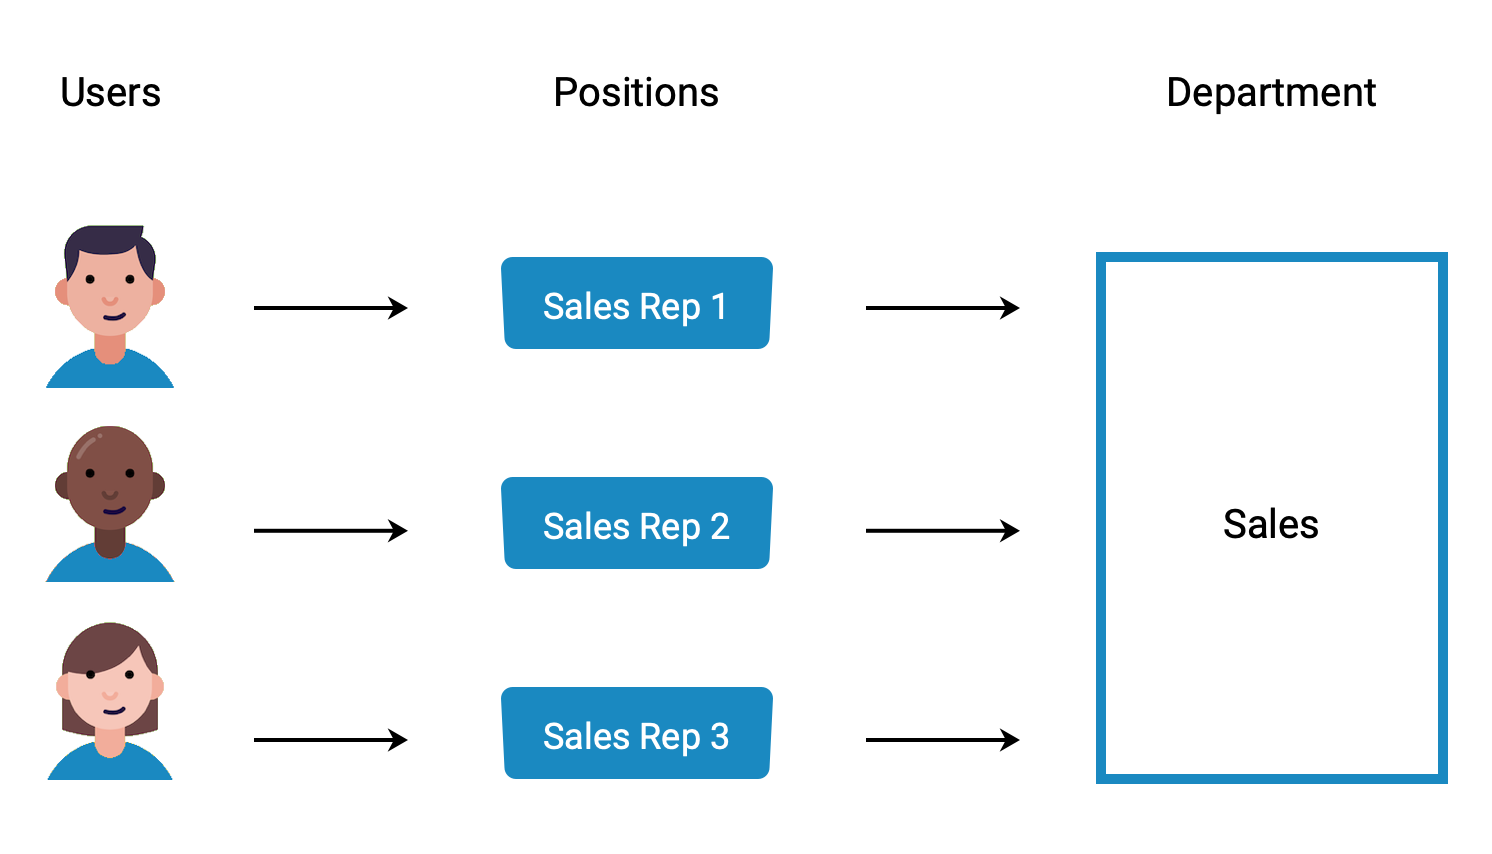
A user’s account defines their personal info and contact details. A job defines the required competencies, responsibilities, education, etc. Positions link a user’s account to a job. A position can be linked to a parent position and to direct reports to reflect the reporting hierarchy of your organization. Positions are sorted into departments to further define this structure.
Why set up positions?
If you import user accounts, you’ll be setting up the org structure through the import. If you’re creating users manually, you’ll want to also manually create positions. Here’s what positions allow you to do in CompetencyCore:
Perform tasks: A position links a user to their job, and CompetencyCore tasks are based on jobs. Assessment questions and development goals are populated from a job’s competencies, so an org structure speeds up the process of creating these tasks.
Engage employees: Linking users to jobs helps them to fill out their profile. Competencies, education, knowledge areas, etc. are suggested to the user based on job requirements. Instead of manually adding items one at a time, users can complete their profile with just a few clicks. A user with a complete profile can explore job matches and compare their qualifications with other jobs. This encourages employees to develop their careers within your organization.
Identify opportunities: You might have multiple employees performing the same job. Instead of creating multiple jobs, create multiple positions (Sales Rep 1, Sales Rep 2, Sales Rep 3, etc.) and link them all to the Sales Rep job. Linking users to jobs through positions allows HR to see how many users perform the same job and where vacant positions can be filled.
Creating positions
If you have several employees performing the same role, we recommend creating multiple positions (one for each user). For example, create three positions: “Sales Representative 1”, “Sales Representative 2”, and Sales Representative 3” and associate all three to the same job.
- Click the gear icon on the top right of your screen.
- Expand User Management in the Administration menu and click Users.
- Click Add on the top right of the page and select New Position.
- Enter a title for the position and click Add. Multiple positions can share the same name.
- Click Add for each of the following to set up this position’s associations:
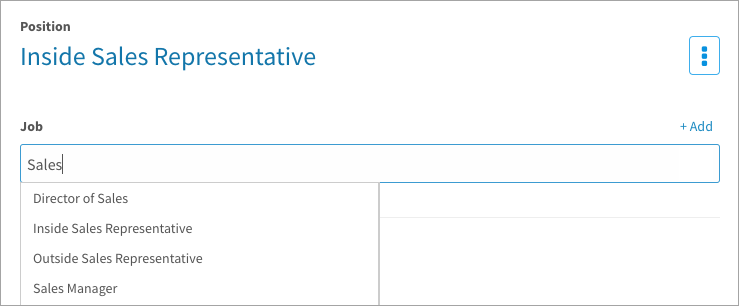
- Job: Search or browse for a job description to associate to this position. A job can be associated to multiple positions, but each position can only be associated to one job.
- Reports to: Search or browse for the position that manages this position.
- Direct reports: Search or browse for the positions that report to this position.
- Department: Search for one or more departments to place this position.
- Description: Enter an optional description of the position.
- Click Assign User or I’m Done if you haven’t already created users or imported users.
- Search or browse for the employee currently filling this position and click Add. If the user is already in another position, they will be reassigned. Each position can only be filled by one user so we can identify vacant positions.
Caution: If employee sign-off is enabled and the position is associated to a job description, adding a user automatically sends a sign-off request to that user.
Making changes to positions
Editing or renaming a position
- Click the gear icon on the top right of your screen.
- Expand User Management in the Administration menu and click Users.
- Click the filters icon to help you find a specific position.
- Click the name of a position to open the Position Details page.
- Click the Edit Position button.
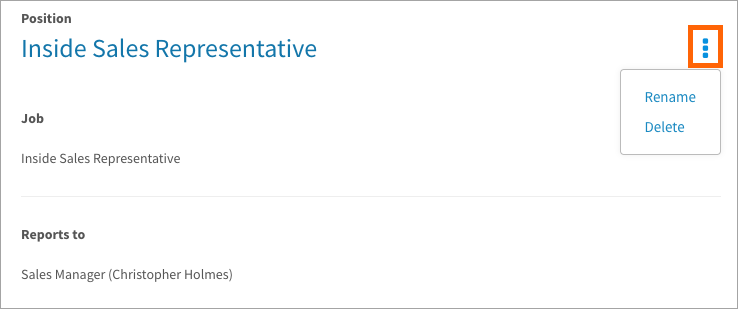
- Click the 3-dot icon and select Rename. Change the title and click Save.
- Point the associated job or manager and click the x icon in order to add another. You can add multiple direct reports and departments. These changes are live saved.
- Click the pencil icon to edit the description and click Save.
- Click the back arrow to return to view mode.
Removing a user’s position
- Click the gear icon on the top right of your screen.
- Expand User Management in the Administration menu and click Users.
- Click the filters icon to help you find a specific user.
- Click the name of a user to open the User Details page.
- Click Actions and select Remove. Click OK to confirm.
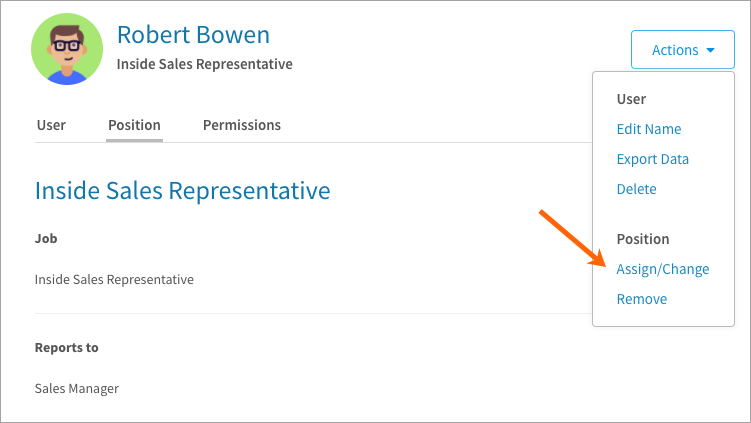
Changing a user’s position
- Click the gear icon on the top right of your screen.
- Expand User Management in the Administration menu and click Users.
- Click the filters icon to help you find a specific user.
- Click the name of a user to open the User Details page.
- Click Actions and select Assign/Change.
- Search for an existing position. If another user is in that position, select an option:
- Reassign the position to this user
- Create a new position with the same title
- Click Assign.
Assigning multiple positions to a user
Add multiple positions for cases where one employee performs more than one role.
- Click the gear icon on the top right of your screen.
- Expand User Management in the Administration menu and click Users.
- Click the filters icon to help you find a specific user.
- Click the name of a user to open the User Details page.
- Click Actions and select Assign/Change.
- Search for an existing position. If another user is in that position, select an option:
- Reassign the position to this user
- Create a new position with the same title
- Select the Add as an additional position for this user checkbox and click Assign.
Note: A user with more than one position will be listed multiple times in the Users table alongside each of their associated positions.

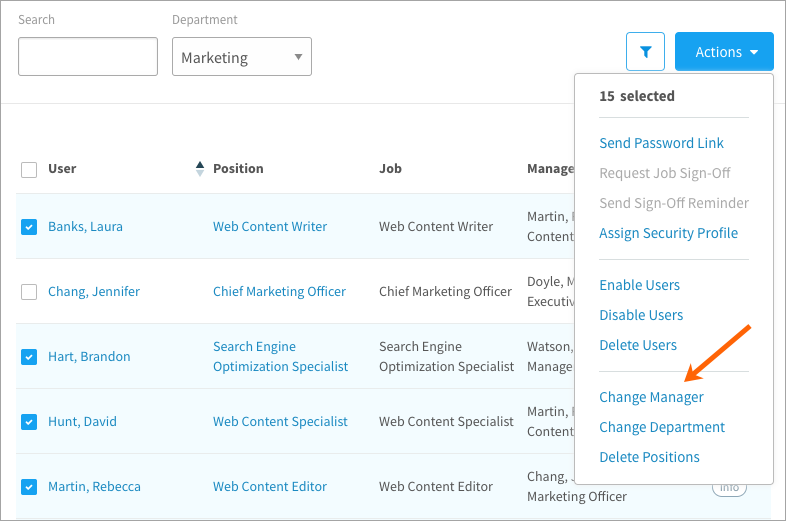
Changing a position’s manager
- Click the gear icon on the top right of your screen.
- Expand User Management in the Administration menu and click Users.
- Click the filters icon to help you find specific positions.
- Select positions in the table.
- Click Actions and select Change Manager.
- Search for an existing position and click Change.
Changing a position’s department
- Click the gear icon on the top right of your screen.
- Expand User Management in the Administration menu and click Users.
- Click the filters icon to help you find specific positions.
- Select positions in the table.
- Click Actions and select Change Department.
- Search for an existing department.
- Decide whether to include reports (all reports, not only direct reports), and click Change.
Tip: This action removes the position from its current department. Click a position to open the Details page if you want to add that position to multiple departments.
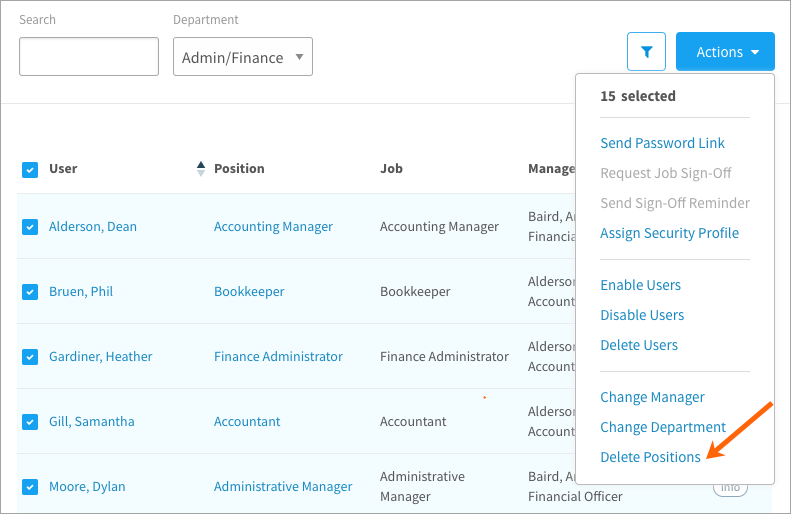
Deleting positions
- Click the gear icon on the top right of your screen.
- Expand User Management in the Administration menu and click Users.
- Click the filters icon to help you find specific positions.
- Select positions in the table.
- Click Actions and select Delete Positions.
- Click Delete to confirm.