Learn how to quickly set up user accounts to give access to your CompetencyCore site
In this article:
Before getting started, you’ll want to give access to the employees who will be working on your CompetencyCore site. Follow the steps below to create accounts and make these users administrators so they have the permissions they need to get your site up and running quickly. While we have an organization import that allows you to quickly create accounts for everyone in your organization, this manual process works well when you just have a few users to add.
Step 1. Create a user
- Click the gear icon on the top right of your screen.
- Expand User Management in the Administration menu and click Users.
- Click Add on the top right of the page and select New User.
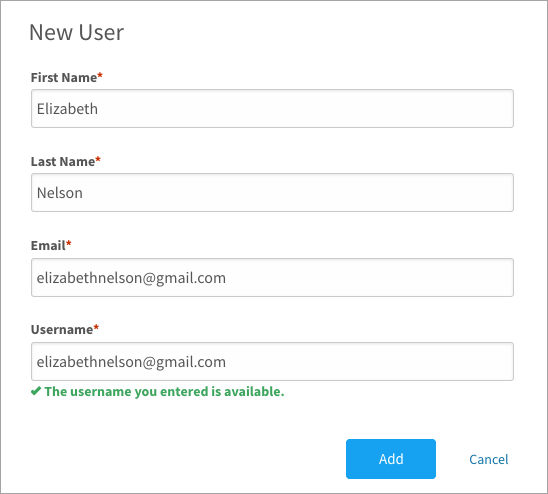
- Enter a first name, last name, email, and username. Click Add.
Step 2. Give permissions
If you want this user to have administrative permissions so they can build job descriptions or dispatch assessments, follow the steps below to add them to the Administrator Security Group.
- Click the gear icon on the top right of your screen.
- Expand User Management in the Administration menu and click Users.
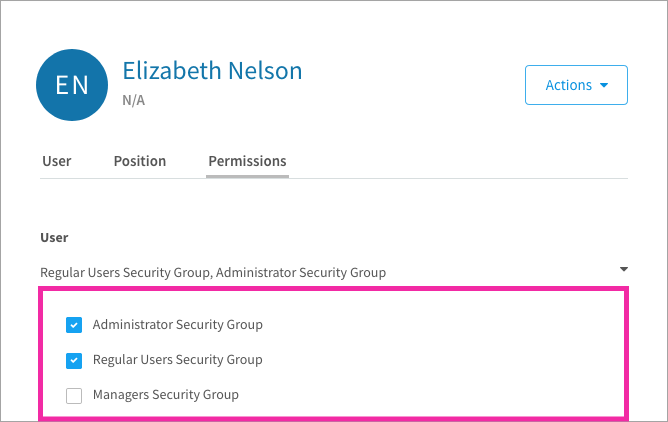
- Click the user’s name in the table and click the Permissions tab.
- Click Regular Users Security Group below the User heading.
- Select Administrator Security Group in the dropdown.
Step 3. Create a password
Option 1: Send the user a password link
Follow the steps above to create a new user, or click a name in the Users table to open the user’s details. Click the Send Activation button. The user receives an email with a link to create their own password.
Note: The Send Activation button only appears if the Set passwords setting is turned off. Follow the steps below in Option 2 to turn this setting off, or send the password link from the users table. Learn more

Option 2: Set the user’s password myself
You’ll need to leave the Users page and go to Settings to turn on this option.
- Click the gear icon on the top right of your screen.
- Click Settings in the Administration menu.
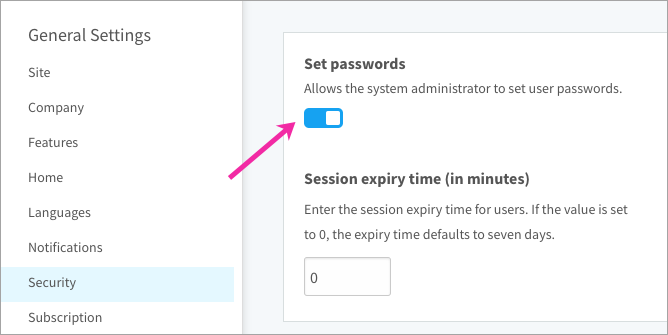
- Click Security under General Settings.
- Turn on the Set passwords switch and click Save.
- Expand User Management in the Administration menu and click Users.
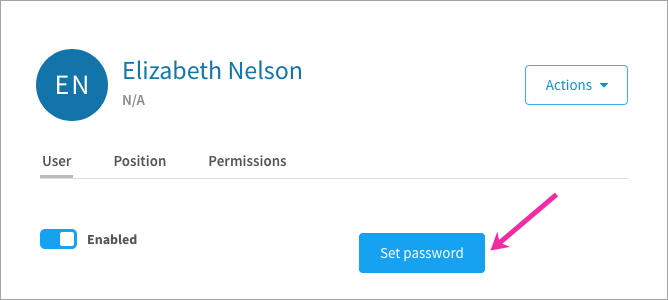
- Click the user’s name and click the Set password link.
- Enter a password, re-enter the password, and click Submit.
- Click Send Notification (optional). The user receives an email with a link to the site.
- Manually send the user an email with their username and password.
And that’s it! Your user’s account is ready to go. Check out the Manage users article to learn more about uploading profile pictures, editing account details, and organizing users. Check out the Manage security profiles article to learn more about controlling what users can access.