Learn how to assign levels to job descriptions so they're structured in a hierarchy from junior to senior
In this article:
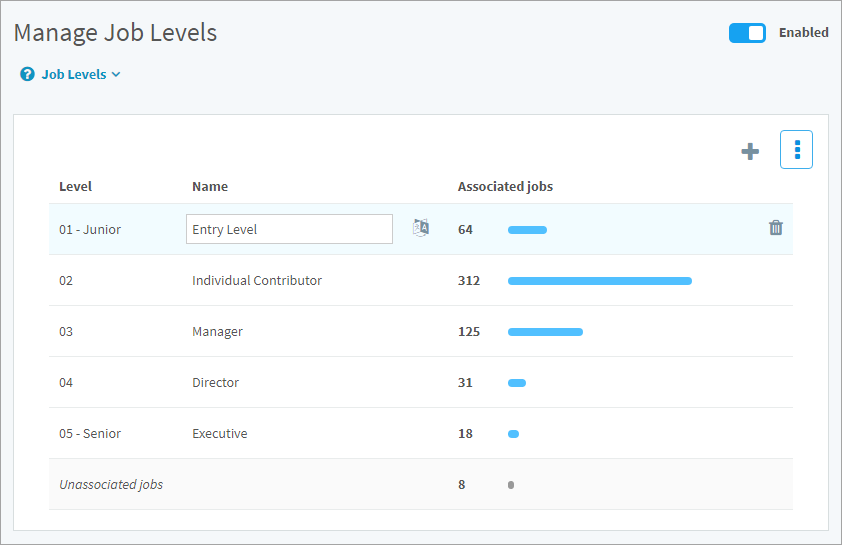
About job levels
Levels such as “Entry Level” or “Executive” structure the jobs on your site from junior to senior. This builds a hierarchy that’s separate from the reporting hierarchy of positions in your organization. You can create as few or as many job levels as your organization needs and customize their names.
Note: Job levels need to be set up to use Career Path or Career Ladders.
Creating job levels
- Click the gear icon on the top right of your screen.
- Expand Architecture in the Administration menu and click Job Levels.
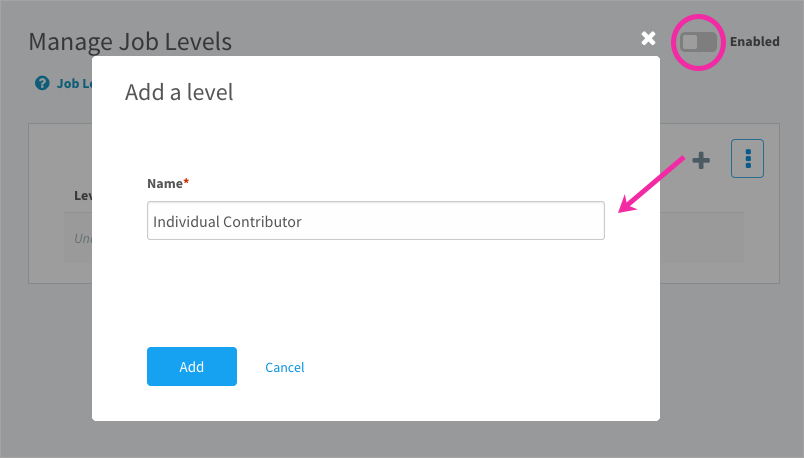
- Click the plus icon on the top right of the table to add a new level.
- Enter a name and insert the level before or after another level. Click Add.
- Repeat step 4 to create as many levels as your organization needs.
- Turn on the Enabled switch on the top right of the page. Disabling won’t remove any content. Once re-enabled, the levels you’ve created and jobs you’ve associated re-appear.
Reordering job levels
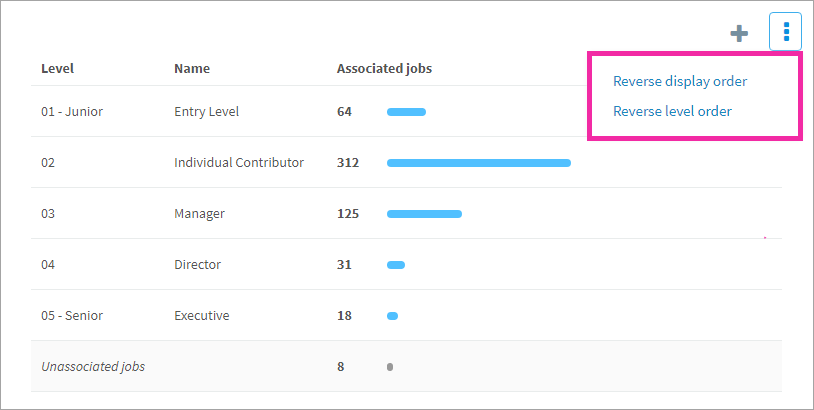
Levels are numbered automatically. The first level is labeled Junior and the last level is labeled Senior. Levels are not just a flat list; the order matters. They progress from most junior to most senior. To adjust this list, point to the 3-dot icon on the top right of the table.
- Reverse display order: This does not affect the the order of levels from junior to senior. This changes the display of levels, which can be sorted in ascending or descending order.
- Reverse level order: The labels in the first column are reversed so you can make Level 1 the most junior or the most senior job level.
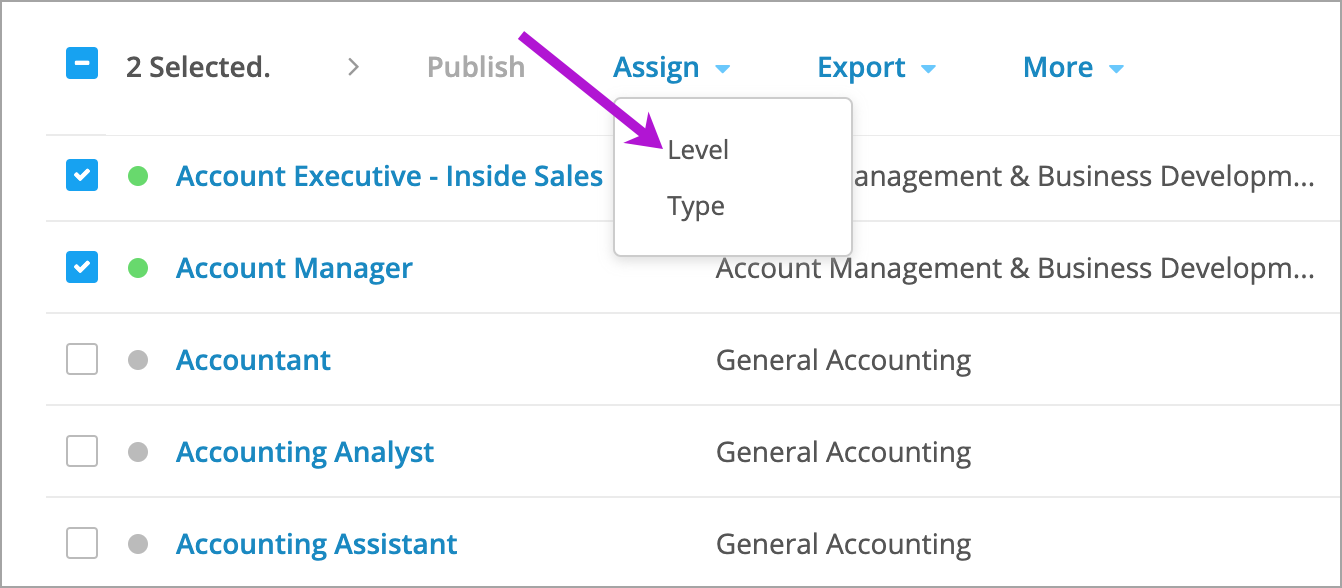
Assigning levels to jobs
Once you’ve created a hierarchy of levels and turned on the Enabled switch, they’re ready to assign to job descriptions. You can select a level while editing a job description, or follow the steps below to assign or unassign levels in bulk from the Jobs table.
- Navigate to Content > Jobs.
- Search for a job and click the 3-dot icon OR
- Select multiple jobs and click Assign.
- Select Level in the drop-down.
- Select a level or select No level.
- Click Save.
Note: A job can only be assigned to one level.