Learn how to select and sort CompetencyCore information to export to Excel
In this article:
- About data exports
- Accessing data exports
- Step 1. Select a type
- Step 2. Select fields
- Step 3. Select filters
- Step 4. Sort the results
- Step 5. Save the data export
About data exports
CompetencyCore collects and stores a lot of information. Sometimes you’ll want to see the big picture by grouping data into one export. Use Data Exports to group similar pieces of data (such as the results of multiple assessments) into one file. Then you can analyze that information using Excel tools like Pivot Tables.
Accessing data exports
- Click the gear icon on the top right of your screen.
- Expand Data Exports in the Administration menu and choose New Data Export.
- Follow the steps below to generate and save your Excel file.
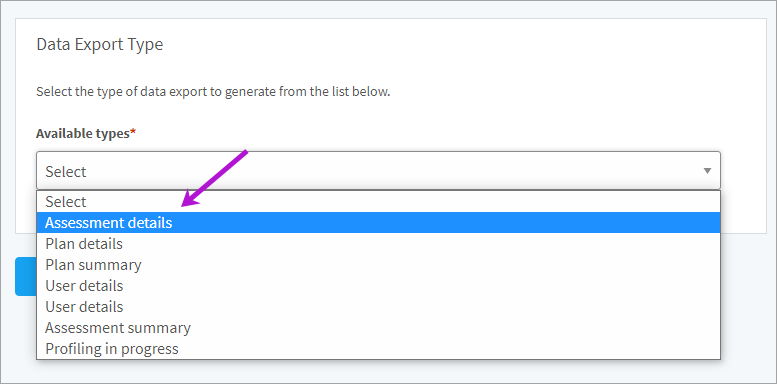
Step 1. Select a type
Select the type of information you want to export such as Assessment Details and click Next.
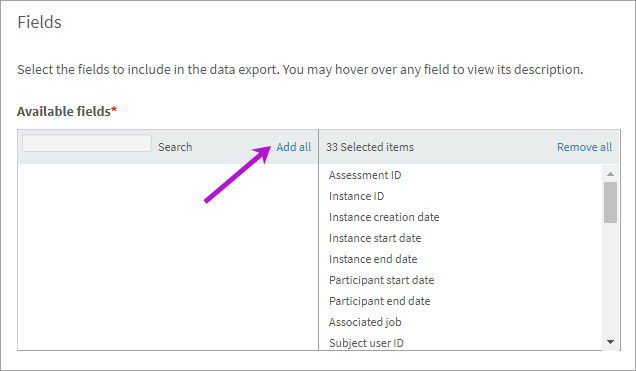
Step 2. Select fields
Select the available fields you want to include as columns in the export. If you’re not sure which to choose, just click Add all.
Step 3. Select filters
Select one of the fields you’ve added in the first drop-down such as Rating. Enter criteria for the field such as Greater Than and enter the specific requirement such as “3”. To add another filter, select AND or OR and click Add. Repeat these steps to add a second field.

For example, you could select Associated Library Item Name in the first drop-down, Equal to in the second drop-down, and type in the name of a competency like “Communication” in the third drop-down.
This export would include records of ratings higher than three where the competency was Communication. If you select OR instead of AND but leave all of the other fields the same, your data export would include any records with the Communication competency as well as any records with a rating higher than three.
Tip: Dates are set at midnight, so if you need to filter by a date, select Greater Than the date rather than Equal.
Step 4. Sort the results
In the Result Order table, you can specify two levels of sorting. Select a field to base your sort on in ascending or descending order. Then you can select a second field to sort within that.
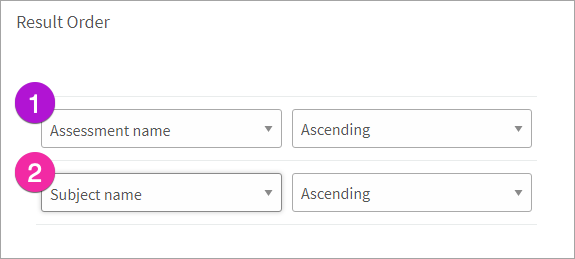
For example, if your first sort level is based on Assessment Name, you’re likely to have multiple people completing the same assessment so you might want to have a second sort level within the assessment name that sorts by the Subject Name.
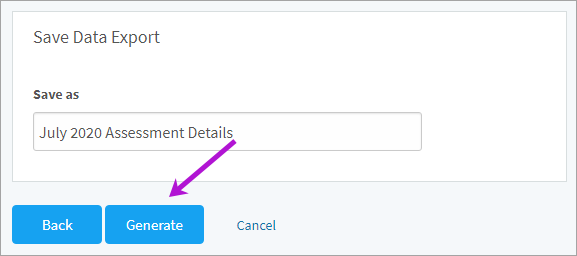
Step 5. Save the data export
Enter a file name and then click Generate. This is the file name used on the My Saved Data Exports page, not the name saved in the Excel file.